How to Use a Spray-Applied Water-Resistive Barrier
A liquid WRB is an economical way to make a house airtight and waterproof—and it goes on fast and won’t blow off.
Synopsis: There are several ways to add a water-resistive barrier (WRB) to a house: attach housewrap to the sheathing, use sheathing panels with an integral WRB, or attach a fully adhered WRB to the sheathing. In this article, Andrew Hall describes the method his firm uses—a spray-applied product that not only provides water resistance but enables the builders he works with to achieve the airtightness requirements in the 2012 IRC with very little additional air-sealing. Hall provides an overview of how the product is applied first to seams and corners, and then to the field. Senior editor Patrick McCombe adds a brief analysis of the relative costs of the different methods of installing a WRB.
My company does a lot of work in and around Boston, an area that’s been undergoing a residential building boom for almost a decade. When I drive around, I routinely see single-family and multifamily homes under construction—with the housewrap flapping in the breeze. I often wonder if anybody will make repairs before the siding is installed. Even when the housewrap is securely fastened, I also regularly see reverse laps, missing sections, and sloppy corners that the siding subcontractor is unlikely to fix before he does his work. Even worse, the sider may simply cut off or tear off the flapping wrap so he can fit the siding, potentially dumping water on the bare sheathing until somebody notices years down the road.
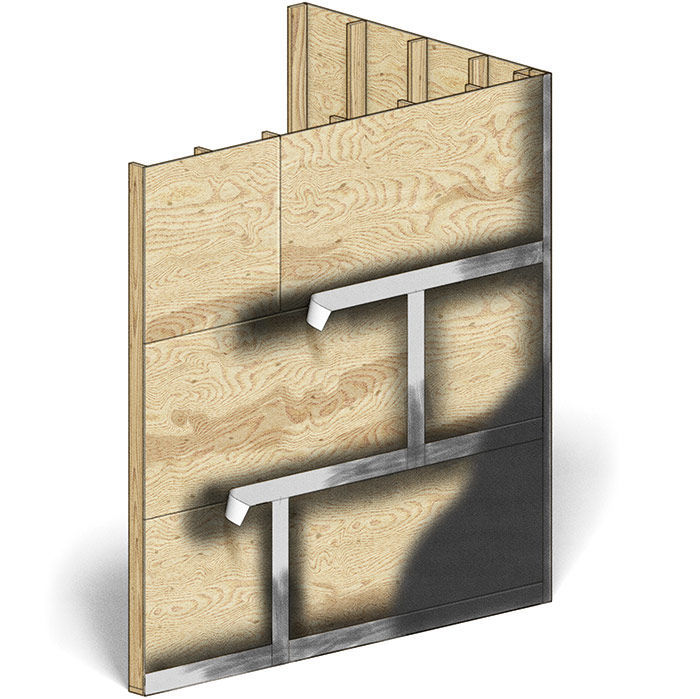 My company started out doing concrete coatings in the late 1960s, and I’m the third generation to work in the family business. In addition to installing waterproofing and epoxy coatings on concrete and masonry, we’ve installed Tremco Barrier Solutions’ Enviro-Dri weatherproofing system since 2009. Enviro-Dri can only be installed by trained contractors. This vapor-permeable (12 perms) spray-applied water-resistive barrier (WRB) forms a continuous waterproof skin over the sheathing, greatly reducing air leakage and blocking water that gets through the siding. The asphalt-based coating will not blow off, it covers the sheathing nails to prevent water from following the nail holes into the framing, and it can be left exposed for up to 120 days. Although the system costs more than regular housewrap, our builders routinely meet the new airtightness requirements in the 2012 IRC with very little additional air-sealing. We can even return after the rough-ins to seal around penetrations, using flexible flashing that integrates into the spray-applied WRB. On many projects, we include a flashing that’s designed to go over the windows’ nailing fin. On this project, we will return to install the counterflashing above the windows after they’re installed because they are getting a special casing. Usually we install the counterflashing before the windows are installed. Other specialty flashings allow us to integrate brick ledges, intersecting roofs, and arches.
When my company first started offering this weather-barrier system, we tried applying it from buckets with extension rollers. Later we used pressure rollers fed from a small airless sprayer. Both methods are slow compared to the gas-powered Graco Gmax 5900 sprayer we use now. It’s also messier and more difficult to get the required thickness of 12 to 15 wet mils with a roller.
When is the right time?
In an ideal world, we’re called to the site just after the building is fully framed and sheathed. We prefer to get there before the soffit or other trim details are installed so we don’t have to protect them from overspray. We also tell the GC and any tradespeople on site to keep their cars and gear away from the house. Overspray can be cleaned off of most surfaces with soap and water as long as it hasn’t fully cured, but it is more difficult to remove overspray from concrete and masonry foundations, so we at least mask those. In fact, the material’s chemical composition is very similar to that of the manufacturer’s spray-applied foundation coating.
The coating can be applied to OSB, plywood, glass-mat wallboard, fiberboard, and even concrete block. While the application temperature for surfaces is 0°F to 130°F, we typically apply when the temperature is between 20°F and 90°F. On really hot or really cold days, you have to work in small areas, as the coating may dry or freeze too quickly to allow the joint fabric to be embedded into wet membrane. Surprisingly, the product is a water-based asphalt coating with polymers, so even though the manufacturer says that Enviro-Dri can be installed down to 0°F, at temperatures below 40°F, special equipment is required, including a heat exchanger to warm the coating and insulated hoses. We usually wait for warmer temperatures instead of using the additional gear. The product can’t be applied in the rain, and we won’t spray if it is foggy or if rain is expected within a few hours, even though the product only needs a few hours to cure.
Where to start?
Once we’ve finished masking, we start the application process by coating and sealing all of the vertical and horizontal joints between sheathing panels. Wearing nitrile gloves and carrying scissors and 4-in. chip brushes, we start work from the bottom of the house and move upward to ensure that the joint fabric we embed in the coating is lapped correctly to shed water. We start with the horizontal and vertical seams on the first two rows of sheathing, and save inside and outside corners until the flat seams have had a chance to set up, usually about 15 to 30 minutes later. If we don’t wait, the pressure from the sprayer can lift the joint fabric from the flat seams when we apply the coating to the corners.
We make a pass over each seam with the sprayer, and then we embed a nonwoven polyester reinforcing joint fabric in the wet coating. We use the chip brushes to fully embed the fabric and even the coating. Then we spray a second coat at 20 wet mils on top of the joint fabric. We use a 3-in. joint fabric on flat seams and a 6-in. joint fabric on corners, although we can use the wider fabric on especially large gaps (up to 3 in. wide). The joint fabric reinforces the sheathing seams and seals any gaps, including where the sheathing meets the foundation, so the coating can accommodate seasonal movement without cracking. Sometimes GCs ask about the bubbles that can form at wider gaps. As long as the joint fabric is fully adhered on its edges, the system will be airtight and waterproof. If they’re unconvinced, I prove it to them with a garden hose.
We usually work as a two-person team. I work from a boom lift, and my coworker seals seams and sprays the first 8 ft. of the sheathing from a 6-ft. stepladder. It takes a day and a half to two days to completely install the WRB and the flashing on a house like the one shown here.
Sometimes I wonder what will happen to those buildings with their poorly installed housewrap, but I don’t have to wonder about the jobs we do. I know they’re going to be airtight and waterproof for decades.
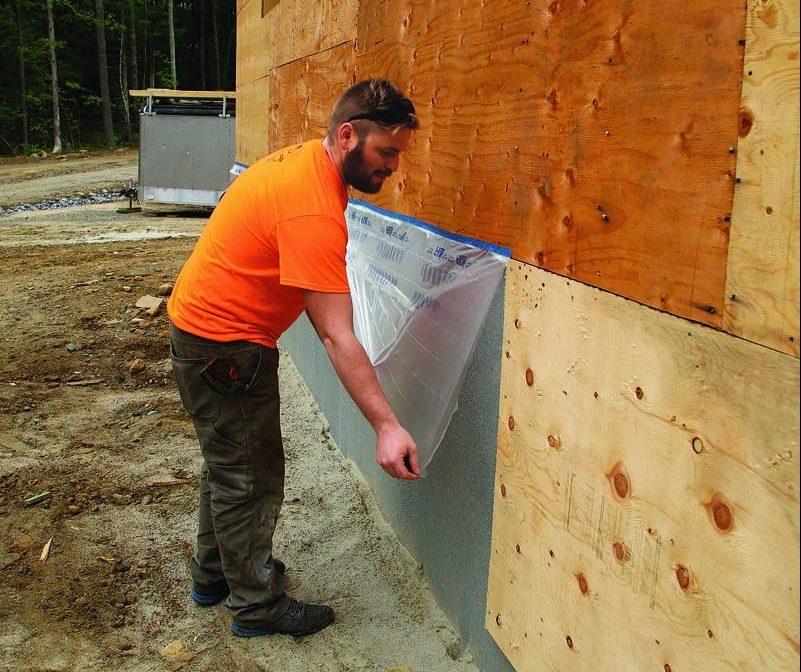
1. Start at the seams. Overspray from the water-borne asphalt-based coating can stain concrete and masonry, so the first step is to cover those areas with painter’s tape and plastic sheeting. The tape won’t stick to concrete, so we apply it to the edge of the sheathing. The area under the tape gets coated with a brush later.
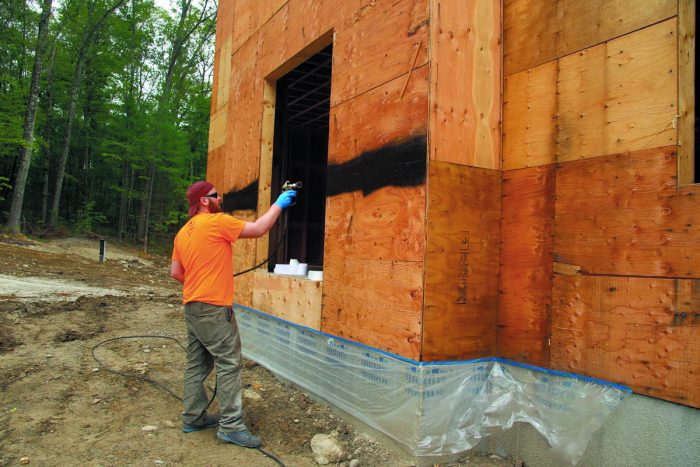
2. Spray a base coat. Seams and corners are sprayed first with a 10-mil to 15-mil layer of the waterproof coating. Work starts at the bottom of the wall and moves upward to ensure that the seams are lapped shingle-style to better shed water.
3. Reinforce the seam. Seams and corners are reinforced with 3-in.-wide polyester joint fabric that looks like toilet paper but is really strong. It’s cut to length with scissors and then smoothed and embedded in the coating underneath with 4-in. chip brushes.
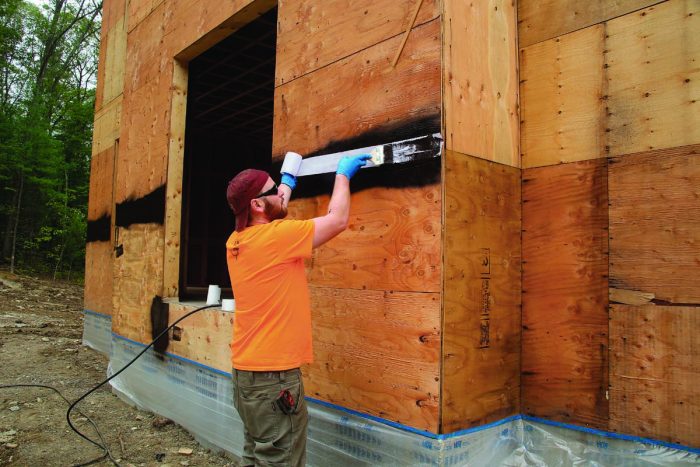
4. Apply a second coat. Once the joint fabric is in place, the seam is covered again with a 20-mil layer of coating. All the horizontal and vertical seams are lapped to shed water and are allowed to dry for 15 to 30 minutes before neighboring inside and outside corners are treated.

5. Corners are next. Once the field seams are set up, neighboring corners are treated. The process is similar to field seams: The corners are sprayed with a base layer of coating, 6-in. polyester joint tape is applied to the wet film, and the corner is sprayed again.
 |
 |
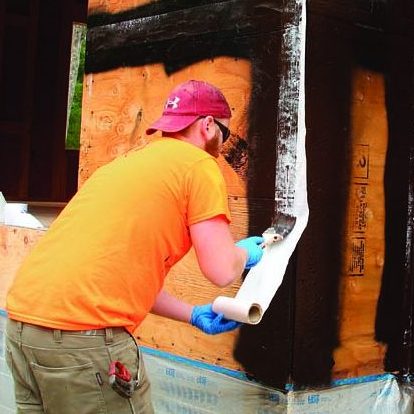
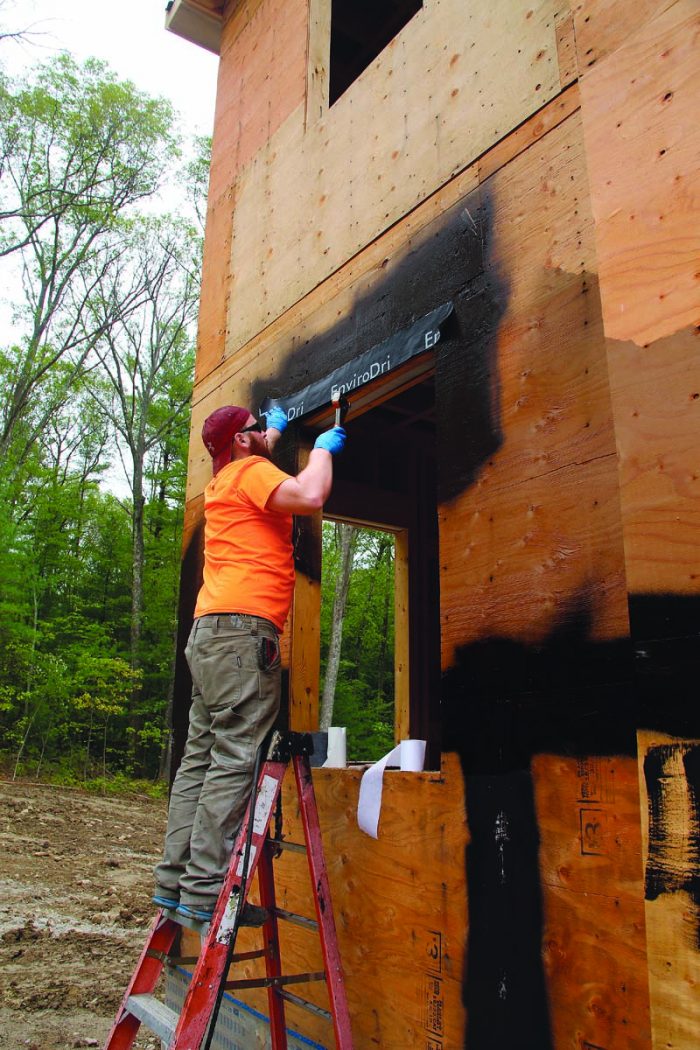
6.Flash rough openings. As part of this spray-applied WRB system, doors and windows are commonly counterflashed above the opening. The counterflashing allows you to slip a window’s nailing flange underneath. The plastic flashing is adhered to the coating, and the seam is reinforced with joint tape and sprayed again.
 |
 |
7. Then Hit the field. Once all seams and corners on an elevation are coated and reinforced, the field is sprayed with a 10-mil to 15-mil coat. The first 8 ft. of sheathing is accessed with a 6-ft. stepladder. A boom lift makes it fast and easy to reach the high work.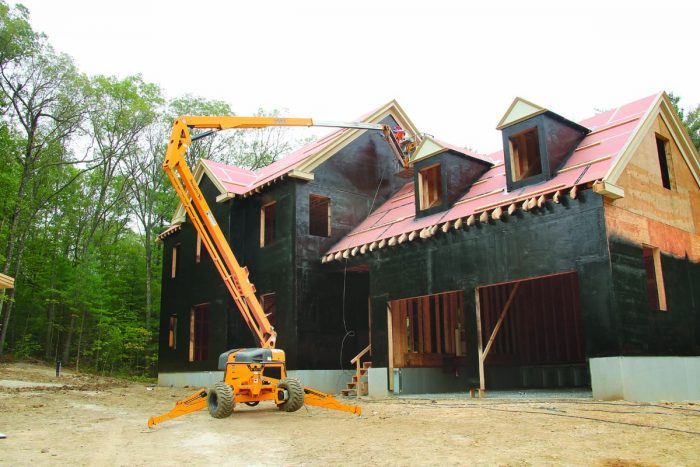
8. Gap-free and fastener-free. When finished, a spray-applied WRB creates a continuous airtight and waterproof skin that’s free of fasteners. The dry coating is compatible with any exterior cladding, and it won’t blow off while the house waits for siding. 
The dollars and sense of water-resistive barriers
Comparing the cost of installing a spray-applied water-resistive barrier such as Enviro-Dri to the cost of installing other WRBs is more difficult than it first appears, because you need to factor in more than just the cost of the WRB. For a fair comparison, you also have to include the sheathing—an integrated component in Zip System—as well as the labor. Both housewrap and Zip System tape are usually installed by the framing subcontractors and are included in their bid. A fair comparison should also include some labor to air-seal areas that aren’t typically in a framer’s bid, including sealing the sheathing to the foundation and filling any gaps between panels and where intersecting walls meet. The prices below don’t include labor, except for the spray-applied WRB, which has to be installed by a specialty subcontractor.
—Patrick McCombe
| Housewrap (such as tyvek)  |
Panels with integral wrb (such as zip system) 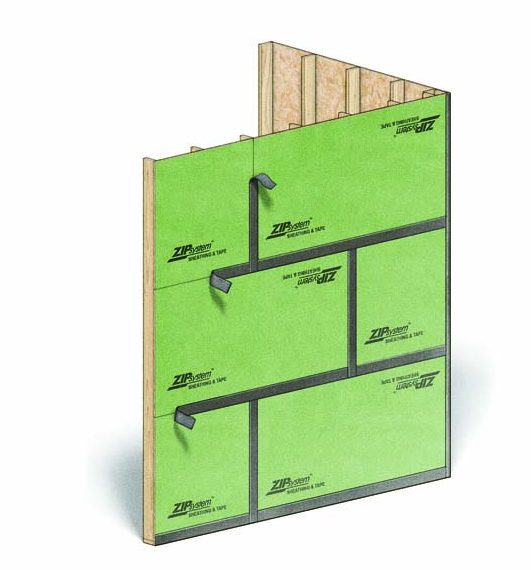 |
| Spray-applied WRB (such as Enviro-DrI)  |
Fully adhered WRB (Such as Henry Blueskin 100 VP)  |
From Fine Homebuilding #280
To view the entire article, please click the View PDF button below.
More about water-resistive barriers:
- UV-Resistant Housewrap
- Self-stick WRB: Renovating a 150-year-old house presents leaky challenges
- How to Install a Ventilated Rain Screen
Fine Homebuilding Recommended Products
Fine Homebuilding receives a commission for items purchased through links on this site, including Amazon Associates and other affiliate advertising programs.
Staple Gun
Loctite Foamboard Adhesive
Caulking Gun

View Comments
You may want to check the text under the title. It says "and it's an economical way to get a make a house airtight and..."
My thoughts exactly...