Finishing Drywall With Seamless Results
Combine proven techniques and specialized tools to improve your work with tape and compound.
Synopsis: Builders on a budget or who have a small job to complete may choose to hang and tape the drywall themselves. Longtime FHB contributor and professional drywaller Myron Ferguson demonstrates how to use a variety of taping tools, from a simple knife to an automatic taper, to achieve a smooth look when finishing drywall.
For many builders, hanging and taping drywall means a call to their favorite subcontractor. But for smaller projects or those with a limited budget, sometimes it makes sense to tackle the job yourself. And while hanging drywall is fairly straightforward, taping can be a slow, money-gobbling process, especially if you’re inexperienced. For those who only occasionally do drywall work, it’s worth learning some time-saving methods and which tools make the most sense for achieving flawless results.
For the sake of efficiency, I’ll concentrate on the tasks that make up the bulk of drywall-finishing work: taping seams and inside corners. Coating fasteners and taping outside corners are tasks that don’t require much explanation, although it’s worth noting that I’ve found it’s just as fast to use hand tools for those areas as it is to use the specialized devices some pros employ.
There are three basic steps for finishing drywall: Lay down a layer of joint compound and bed the tape, apply the fill coat of compound that conceals the tape, and finish with a final coat to blend the compound into the surrounding drywall. I also sand after both fill and final coats. Here, I’ll discuss each step, progressing from a manual approach to those that use more specialized tools, and I’ll make some recommendations for those tools that will help your productivity. Keep in mind that these dedicated tools can only do so much, and that good knife and trowel
techniques are still invaluable for achieving seamless-looking drywall.
Taping Flat Seams
Whether tapered or butt, seams are covered with drywall tape that is embedded tightly against the drywall in a layer of heavier all-purpose joint compound. Successive layers of a lighter-weight compound (such as USG’s Plus 3) are then applied to fair out the initial coat.
Step 1: Bed the tape
Hand tools work best for smaller jobs
To begin, I load up a trowel with compound (or a pan, if the compound’s consistency is soupier) and use a 6-in. knife to apply the compound to the seam. The compound should be wider than the tape and deep enough to adhere the tape to the drywall. Next, I press the tape into the compound with a finger and then apply lots of pressure with the 6-in. knife to flatten the tape and compound.


Cover a lot of territory with a compound tube
To spread out a lot of compound over long seams, I sometimes use a compound tube that acts like a huge syringe, squeezing out the compound through a specialized applicator head. I fill the tube with a mix of all-purpose compound thinned with a little water, and then snap the flat applicator’s pivoting head socket onto the ball at the tube’s end. As I apply pressure to the handle, the tube leaves a flat ribbon of compound about 2 in. wide and 1/4 in. thick over the seam. If I have to apply excessive pressure on the handle, then I know the compound is too thick and I need to add a bit more water. I usually apply compound to a number of seams in one area, then manually bed the tape with an 8-in. knife and a compound pan to catch the excess mud.


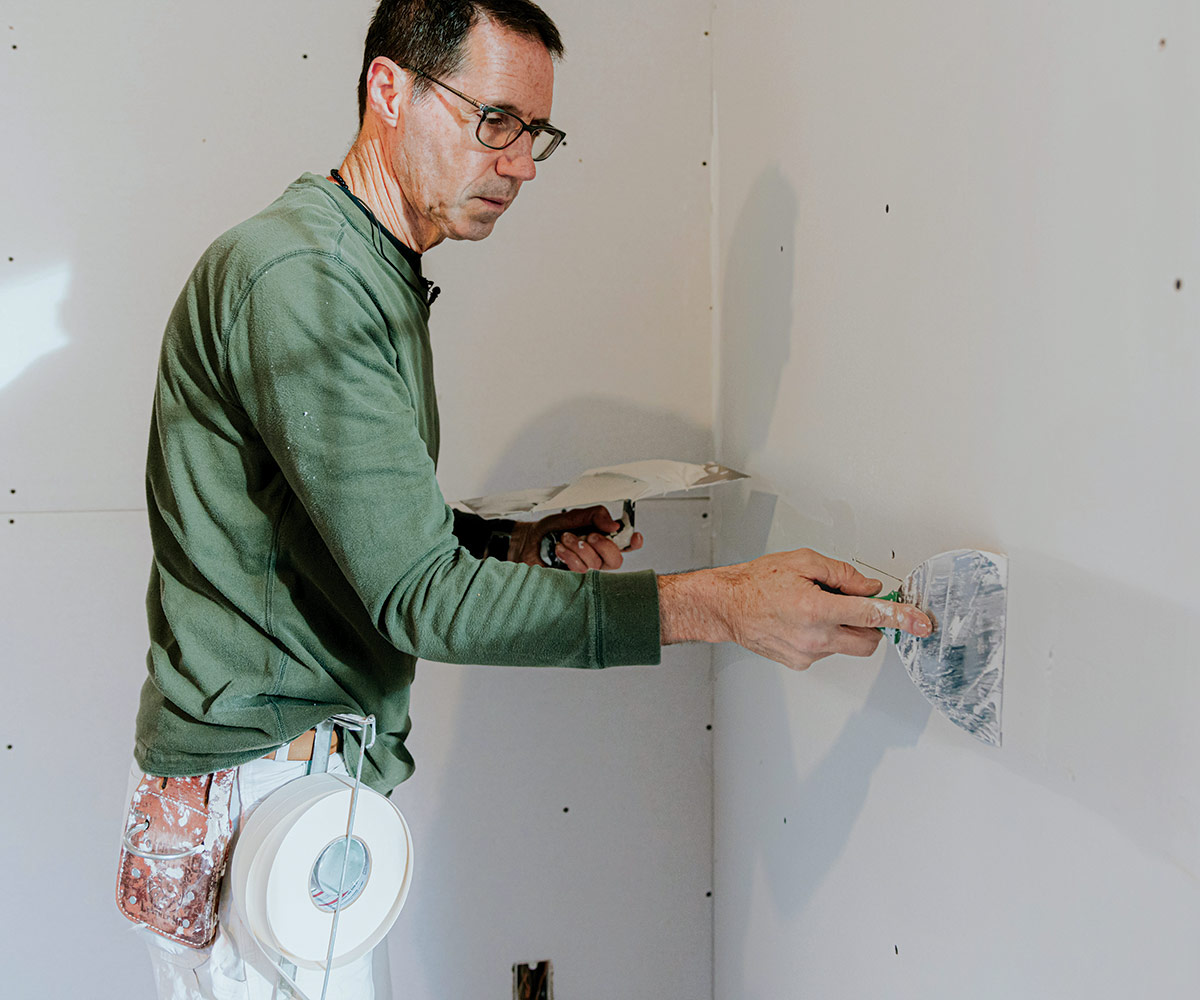
Multitask with a banjo
For most of my flat seam work, I use a taping tool called a banjo. Although it holds less compound than a tube, it’s relatively inexpensive, easier to control due to its small size, and faster to work with because it applies compound and tape over a drywall seam all in one motion.

Geared teeth at the banjo’s front pull the tape spooled at the back of the tool through a reservoir filled with thinned-down all-purpose compound. As the tape exits the tool and is pressed into the seam, an adjustable gate at the mouth screeds away excess compound. I then bed the tape with an 8-in. knife. This particular banjo holds about 35 ft. of tape.
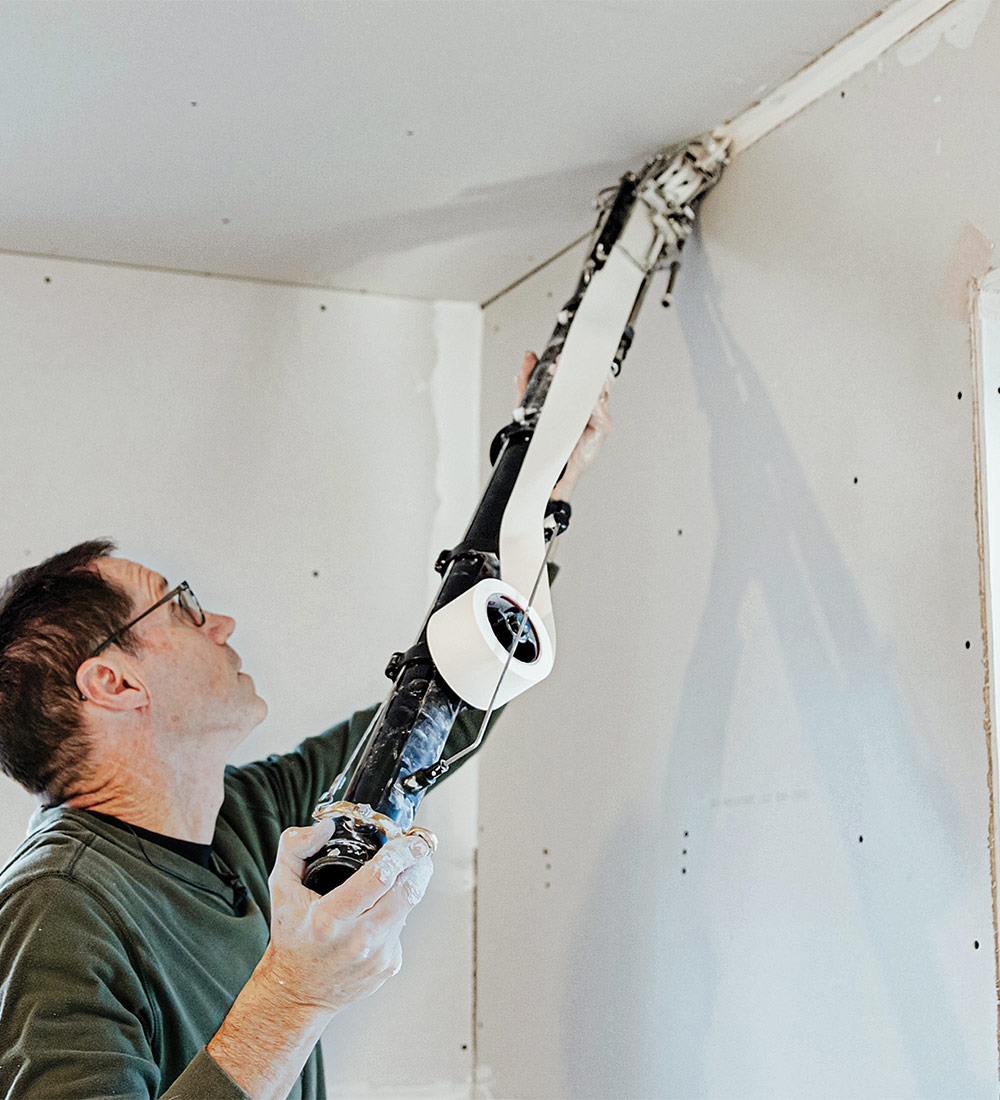
Use a bazooka for big jobs
If I’m taping more than 1000 sq. ft. of drywall, I use an automatic taper (called a bazooka). I’ve found it too cumbersome to use comfortably in tight spaces, but like the banjo, it applies both compound and tape to seams at the same time. It also requires a mud pump to fill its tube with a thinned mix. As you push the tool along the seam, the front wheels activate a piston at the back end that pushes the compound forward, applying a precise amount of compound onto the back of the tape. I still have to bed the tape with an 8-in. or 10-in. knife, but the bazooka’s longer length allows most users to tape ceiling seams without stilts, and with its greater capacity it can apply about 75 ft. of tape with one fill.

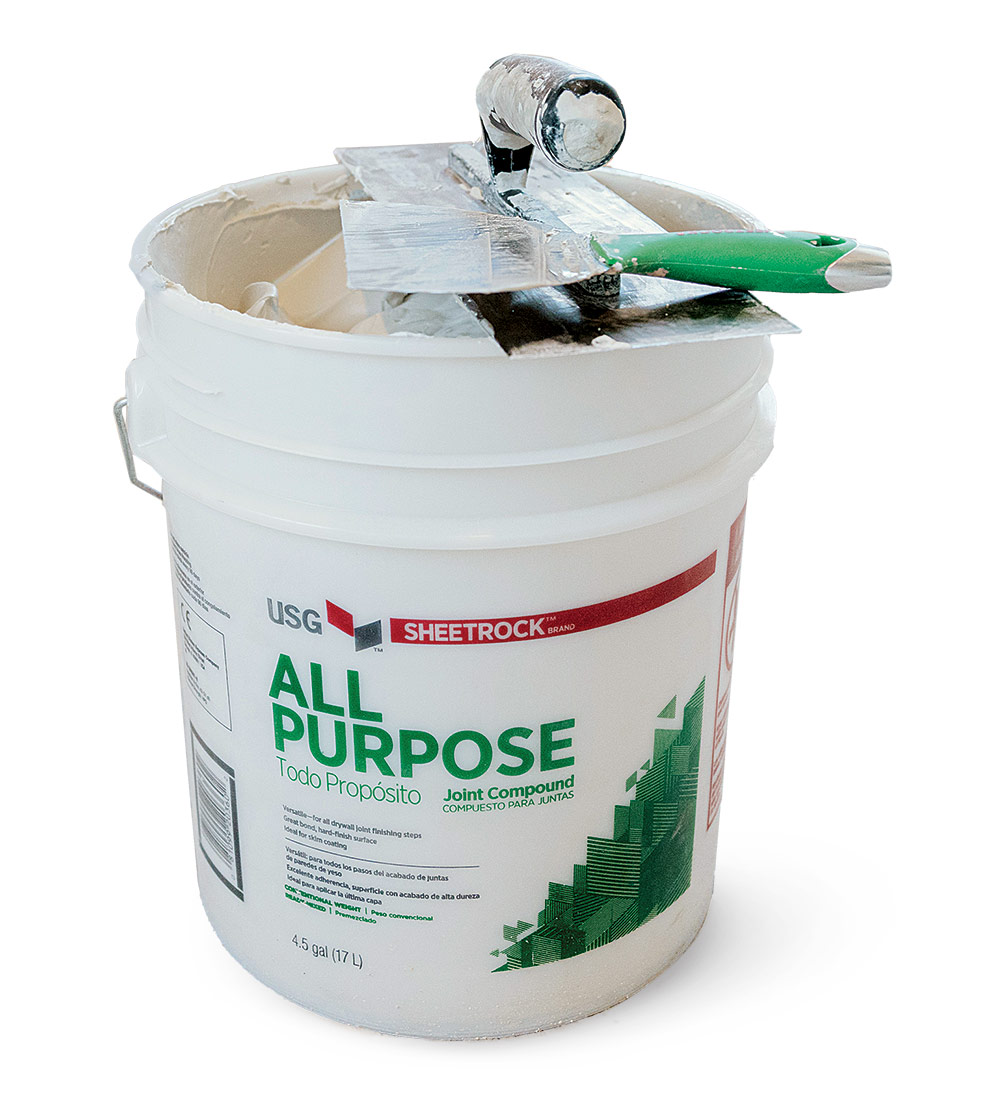
Thinning compound
When using specialized tools that push compound out onto the drywall, you must thin the compound with water. Different tools work best with mixes of different consistencies; the same thin mix that rollers need would, in a compound tube, ooze onto the floor. My formula is based on experience; the compound can’t be too thin and drippy, nor too difficult to push out of the tool. Achieving the right mix is a matter of trial and error. I add water slowly, stirring with a mixing paddle chucked into the biggest 1⁄2-in. drill I have, and then I test it in the tool I’m going to use. If I need to add more water, I do so sparingly. Too much water and I’ll have to add more compound.
Step 2: Cover the tape with a fill coat
Use hand tools to fill …
For the fill and finish coats, I switch to lightweight joint compound; it dries faster, shrinks less, and is easier to sand than the heavier, all-purpose compound used on the first coat. I apply the compound 8 in. to 10 in. wide with a taping knife, which is thick enough to cover the tape and to fill the recess of the seams.

… and smooth
I use a curved trowel to smooth the compound. The trowel’s radius feathers out the edges and leaves the center with a slight crown (approximately 1mm), enough to allow for shrinkage.

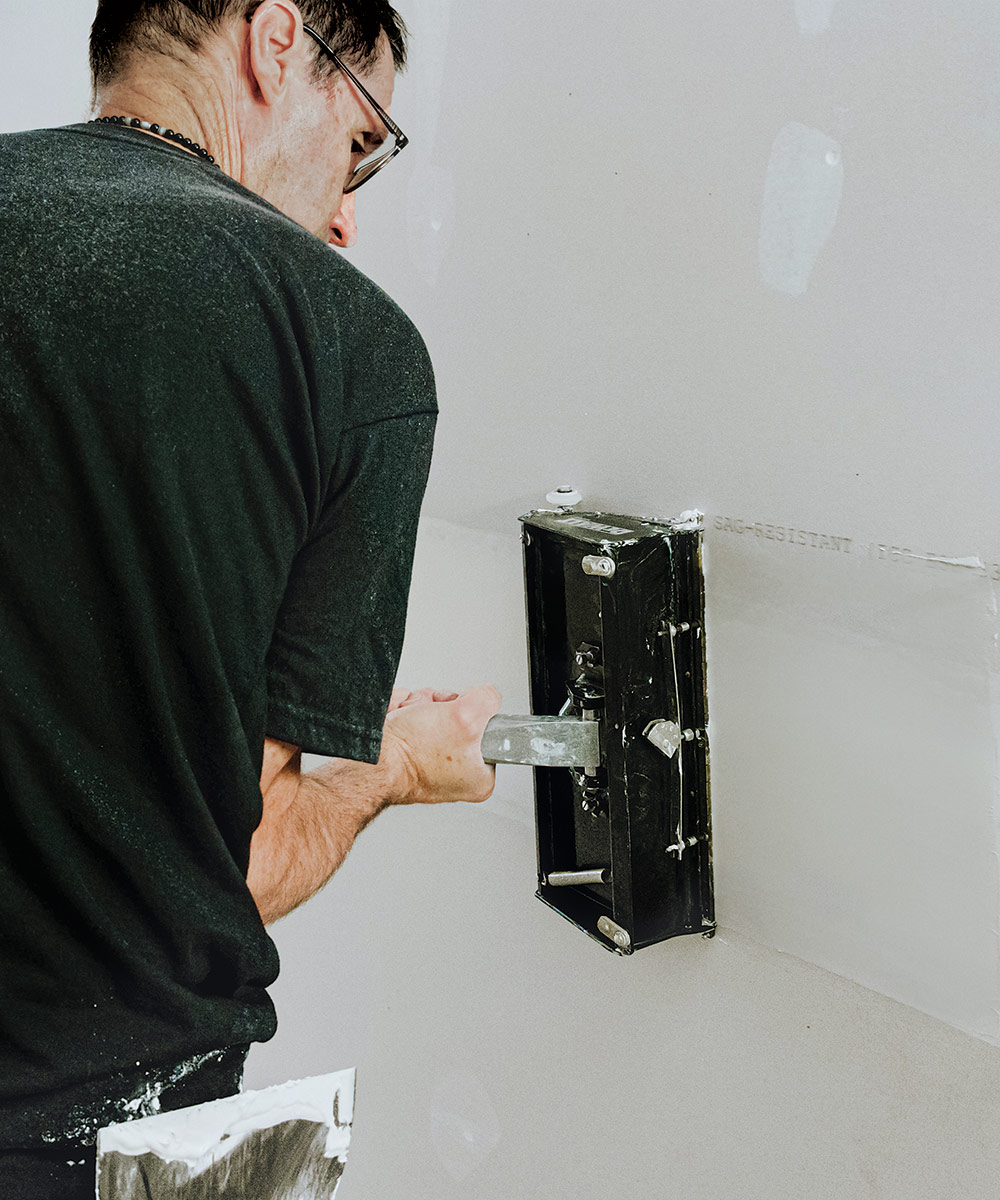
A taping box speeds up the process
On larger jobs, rather than fill-coat by hand, I use taping boxes (also known as flat finishing boxes) that apply a consistently uniform amount of compound along the seams. They require a little more setup and cleaning afterward, but they make up for it with faster production. Pole-mounted and available in widths of 8 in., 10 in., or 12 in., they dispense and smooth the compound as they are moved across the wall. For the fill coat, I use a 10-in.-wide box filled with thinned-down lightweight compound loaded into the mouth of the box with a pump and box-filler attachment. The telescoping handle can also be extended when I’m applying compound to higher areas, so I don’t have to resort to stilts or ladders. If you don’t want to purchase a mud pump, you can pump compound into a taping box with a compound tube that’s equipped with a box-filler attachment.


Mud rollers are good for wide areas
To fill-coat wider areas, I use a specialized 9-in. mud roller with a 3/4-in. textured nylon nap. After dipping the roller in thinned lightweight compound, I roll it over the seam, then feather and smooth the compound with a 12-in. knife. If the mix drips off the roller, I add more compound. After a little practice, it’s faster and much easier to apply compound with a roller than it is with a knife.

Sand to erase the bumps
When the fill coat has dried, I sand with 220-grit paper before I apply the finish coat. Although I still hand-sand with a pole-mounted rectangular or circular pad on small jobs, on bigger jobs I’ve found that a power sander/vacuum combo is about 30% faster than pad-sanding, and it cleans up most of the dust as it goes. It can represent a hefty investment, but it may be available as a rental just for the times when you need it most.

Step 3: Finish with a thin layer
Spread, smooth, and sand by hand
The final coat on the seams is a thin layer of lightweight compound that’s applied across a wider area of the seam to smooth out any imperfections. I usually use a 6-in. or 8-in. knife to spread out the compound (a mud roller is also an option), and a 12-in. knife or trowel to scrape the compound to a thin layer before sanding. I sand once more after the walls have been primed for a slicker finish.

Save time with a taping box
On bigger jobs, I use the 12-in.-wide box filled with a mix that’s thinner than that used for the fill coat. By making two passes over each seam, I don’t have to go back with a trowel to smooth them out. I finish-coat tapered and butt seams separately, then return and fair-in their intersections with a knife and trowel.
Taping inside corners
Inside corners go through the same process as flat seams, but they only receive one fill coat after the tape is embedded. With hand tools, applying compound to both sides of the corner without leaving marks can be tricky, so I apply compound to one side of the corner, let it dry, and then coat the other side. On larger jobs, specialized tools like an automatic taper or compound tube are invaluable, but even if I’m hand-taping I’ve found that the relatively inexpensive pole-mounted corner rollers and finishers can save an enormous amount of time during the bedding and fill coats. As with flat seams, the first coats on inside corners are taped with all-purpose compound. Use lightweight compound for the fill coat.
Hand-bed the tape

Tightly With a 6-in. knife, I apply compound to both sides of the inside corner. After making sure that there aren’t any dry areas or gaps, I crease the tape, place each side of it into the compound, and press both sides with the knife, making sure that the tape is tight to the compound and free of wrinkles.

Bed faster with a corner roller
After applying the tape and compound into a corner, I can bed the tape with a pole-mounted corner roller that simultaneously applies pressure to both sides of the tape. I start in the middle of a run and bed the tape gradually with a few passes, increasing the pressure on each successive pass until the tape is tight against the drywall.

Smooth it out with a corner finisher
With the tape embedded, I could use a knife to smooth out the excess compound, but it’s faster and cleaner to use a pole-mounted, 2-1/2-in.-wide corner finisher that addresses both sides of the corner at the same time. I start at the bottom of wall corners or the corner wall-to-ceiling intersections and push the corner finisher forward while holding the pole at about a 45° angle. With a bit of pressure, two passes are enough to clean the seam’s center and to get both edges feathered out.

Compound tubes excel at corners
Corners are where compound tubes can really speed up the process; with a corner applicator, I can lay down a thinned coat of compound simultaneously to each side of the corner with one pass. On walls, I like to start at the bottom and push the tool upward. I can cover about 50 lin. ft. of inside corners with a full tube. After the compound is applied, I bed the tape with a corner roller and finisher to smooth it out.

A banjo helps in small spaces
For more confined spaces, I like to use the banjo. Its smaller size makes it easier to apply tape where there are lots of jogs in the floor plan. I usually start at the top or end of a corner and pull the banjo so that it’s centered on the corner seam. I place the tape with my free hand as I go, then I either smooth both sides with a knife or use a corner roller and finisher.

Automatic tapers have a long reach
The advantage of the bazooka becomes apparent when it comes to taping horizontal corner seams while walking along on the floor. After loading it with compound, I position it at a 45° angle to the corner, centering the head of the tool so that one wheel rides on each side of the corner. As the tape and compound flow out, I can engage the creaser wheel to bed the center of the tape into the corner. When the wheels are about 4 in. from the end of the corner, I stop, pull back on the sliding portion of the tube to activate the spring-loaded blade inside the tool head, and cut the tape.
Hand tools fill one side at a time
For the fill coat, I use a 6-in. knife to cover an inside corner with lightweight compound, doing one side at a time to avoid tool marks and divots. I try to apply just enough compound to conceal the tape and to feather the outside edges. For three-way corner intersections, I coat the three non-intersecting edges first. When the compound dries, I follow the same process for the opposite side of the corner, allow it to dry, then sand with 220-grit paper.

Compound tubes cover both sides at once
The fill coat is where the compound tube pays for itself. As with the initial bedding, I use the tube fitted with a corner applicator to simultaneously apply lightweight compound to both sides of the corner. I follow with a 3-1/2-in.-wide corner finisher to clean up and fair the edges. After the fill coat has dried, I give it a quick sanding. Then I clean the edges, feather in transitions and three-way corners with a 6-in. knife, let the compound dry, and give it a final sanding.

A drywaller’s toolbox
The tools shown in this article are sourced from the manufacturers listed below. Rather than buying any advanced (and expensive) tools, consider renting them. AMES Taping Tools (amestools.com) has rental centers around the country and may be able to ship the tools to your location.
USG/Sheetrock (sheetrocktools.com)
Festool (festoolusa.com)
CanAm (canamtool.com)
|
Homax (homaxproducts.com)
Level5 (level5tools.com)
DeWalt (dewalt.com)
|
Myron Ferguson is a professional drywaller and certified building-performance analyst. Photos by Andres Samaniego.
RELATED STORIES